|
Os motores de busca de Datasheet de Componentes eletrônicos |
|
|
Os motores de busca de Datasheet de Componentes eletrônicos |
|
27CP-R-PC-CF Folha de dados(PDF) 4 Page - DDK Ltd. |
|
|
|||||||||||||||||||||||||||||
27CP-R-PC-CF Folha de dados(HTML) 4 Page - DDK Ltd. |
|
|
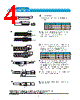
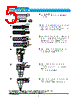
4 / 5 page  Unit:mm http://www.ddknet.co.jp 27CP Series 4 ◎ Please acknowledge that the specification etc. of this catalog might change by the improvement etc. without notice. Moreover, the characteristic and the specification of the published product are the reference values. Please confirm the content with the latest delivery specifications when you use the product. ○Assembly Instruction(1) L1 A 3 Ferule Ferule B C B C Heat-shrinkable tube Soldering Same level Finish 2.5C-2V 1.5C-2V ① Cut the cable as fig.1. The cable length require for the cable assembly L=L1+A+3 Part Number A 27CP-P-1.5-CF 6.4mm 27CP-P-2.5-CF 6.4mm 27CP-BJ-1.5W-CF 8.0mm ② Insert the ferule between outer conductor and sheath when the cable is 2.5C-2V. Insert the ferule until ferule contacts with the sheath when the cable is 1.5C-2V. ① ② ③ ④ ⑤ ⑥ ③ Pick the outer conductor and turn down to the ferule. Cut the extra outer conductor along the ferule. Cut the center conductor as fig.3. Please be careful to not damage the center conductor. Pre-solder the center conductor. Part Number B C 27CP-P-1.5-CF 2.0mm 1.6mm 27CP-P-2.5-CF 2.0mm 1.6mm 27CP-BJ-1.5W-CF 2.0mm 3.0mm ④ Insert the contact and solder from side hole. Please be careful to not make gap between contact and center conductor of the cable and not damage the insulator by heat. When the solder is stick out, please shave the extra solder along the contact. Insert the heat-shrinkable tube. ⑤ Insert the above contact into the body and crimp the root of the body as fig.5. ⑥ Cover the heat shrinkable tube on the root of the body and heat up. |
|
|
Ligação URL |
| ALLDATASHEET é útil para você? [ DONATE ] |
Sobre Alldatasheet | Publicidade | Contato conosco | Privacy Policy | Link para a ficha técnica | roca de Link | Lista de Fabricantes All Rights Reserved©Alldatasheet.com |
| Russian : Alldatasheetru.com | Korean : Alldatasheet.co.kr | Spanish : Alldatasheet.es | French : Alldatasheet.fr | Italian : Alldatasheetit.com Portuguese : Alldatasheetpt.com | Polish : Alldatasheet.pl | Vietnamese : Alldatasheet.vn Indian : Alldatasheet.in | Mexican : Alldatasheet.com.mx | British : Alldatasheet.co.uk | New Zealand : Alldatasheet.co.nz |
|
Family Site : ic2ic.com |
icmetro.com |
 Portuguese ▼
 English
 Chinese
 German
 Japanese
 Russian
 Korean
 Spanish
 French
 Italian
 Portuguese
 Polish
 Vietnamese
 Indian
 Mexican
 British
 New Zealand