|
Os motores de busca de Datasheet de Componentes eletrônicos |
|
|
Os motores de busca de Datasheet de Componentes eletrônicos |
|
E3G-R13 Folha de dados(PDF) 9 Page - Omron Electronics LLC |
|
|
|||||||||||||||||||||||||||||
E3G-R13 Folha de dados(HTML) 9 Page - Omron Electronics LLC |
|
|
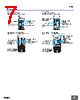
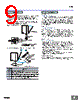
9 / 12 page  E3G 9 ● Wiring • The cable with an external diameter of 6 to 8 mm is recommended. • Be sure to attach the cover with screws securely in order to maintain the water- and dust-resistive properties of the product. The size of the conduit opening is PF1/2 in accordance with JIS B0202. • Do not tighten the Terminal Protection Cover with wires pinched between the Sensor and the cover in order to maintain the water- and dust-resistive properties of the product. • Changing to Side-pullout Cable from Vertical-pullout Cable ● Designing Load Relay Contact If E3G is connected to a load with contacts that spark when the load is turned OFF (e.g., a contactor or valve), the normally-closed side may be turned ON before the normally-open side is turned OFF or vice-versa. If both normally-open output and normally-closed output are used simultaneously, apply an surge suppressor to the load. Refer to OMRON’s PCB Relays Catalog (X33) for typical examples of surge suppressors. ● Wiring Connecting and Wiring The E3G has a built-in function to protect the E3G from load shortcircuiting. If load shortcircuiting results, the output will be turned OFF. In that case, check the wiring and turn ON the E3G again so that the short-circuit protection circuit will be reset. This function will operate if the output current flow is at least 2.0 times the rated load current. If a capacitive load is connected to the E3G, make sure that the inrush current does not exceed 1.2 times the rated load current. ● Mounting Mounting Conditions • If Sensors are mounted face-to-face, make sure that no optical axes cross each other. Otherwise, mutual interference may result. • Be sure to install the Sensor carefully so that the directional angle range of the Sensor will not be directly exposed to intensive light, such as sunlight, fluorescent light, or incandescent light. • Do not strike the Photoelectric Sensor with a hammer or any other tool during the installation of the Sensor, or the Sensor will loose its water-resistive properties. • Use M4 screws to mount the Sensor. • When mounting the case, make sure that the tightening torque applied to each screw does not exceed 1.2 N·m. ● Water Resistance Tighten the operation cover screws and terminal block cover screws to a torque of 0.3 to 0.5 N·m in order to ensure water resistivity. E3G-M @(T) Proce- dure Operation 1 Remove the present cover. 2 Attach the E39-L129 Terminal Protection Cover for side- pullout cable. 3 Remove the clamping nut, washer, and rubber bushing of the E3G. These are used for the side-pullout cable. 4 Attach the rubber bushing and cap provided with the E39-L129 to the E3G as replacements. 33 mm 63 mm Output 2Ta 3Tb 1Tc Power supply 4 5 Rubber bushing* Terminal protection cover Washer* Clamping nut* *Not provided with UL-compliant (-US) models. For UL certified products (-US type), use UL- Listed plastic cable gland. The tightening torque is 3 N.m or less. Recommended Example 4 1 2 2 3 Rubber bushing E39-L129 Terminal Protection Cover Washer Rubber bushing* Cap* Clamping nut *Provided with the E39-L129. All E3G Models |
|
|
Ligação URL |
| ALLDATASHEET é útil para você? [ DONATE ] |
Sobre Alldatasheet | Publicidade | Contato conosco | Privacy Policy | Link para a ficha técnica | roca de Link | Lista de Fabricantes All Rights Reserved©Alldatasheet.com |
| Russian : Alldatasheetru.com | Korean : Alldatasheet.co.kr | Spanish : Alldatasheet.es | French : Alldatasheet.fr | Italian : Alldatasheetit.com Portuguese : Alldatasheetpt.com | Polish : Alldatasheet.pl | Vietnamese : Alldatasheet.vn Indian : Alldatasheet.in | Mexican : Alldatasheet.com.mx | British : Alldatasheet.co.uk | New Zealand : Alldatasheet.co.nz |
|
Family Site : ic2ic.com |
icmetro.com |
 Portuguese ▼
 English
 Chinese
 German
 Japanese
 Russian
 Korean
 Spanish
 French
 Italian
 Portuguese
 Polish
 Vietnamese
 Indian
 Mexican
 British
 New Zealand